Since this post was written, Amazon has launched AWS Certificate Manager, which provides certificates at no cost and substantially simplifies managing them for use in the AWS context. We recommend that readers investigate the AWS Certificate Manager product before following the guidance in this post.
Every day, more and more websites are serving their pages using HTTPS. This can lead to warnings or complete failures when those sites want to embed content from other sites. Until recently, that included embedding work created with Knight Lab's TimelineJS and StoryMapJS. We recently implemented HTTPS to solve this problem, but it was less straightforward than we would have liked. Hopefully this guide will help others who are trying to do the same.
Background
Many of Knight Lab's sites, including the CDN which serves our publishing tools, are served as static websites using Amazon's S3 service. Amazon S3 has always supported SSL using the s3.amazon.com domain name (e.g., https://s3.amazonaws.com/cdn.knightlab.com/libs/timeline/latest/embed/index.html). However, using that means that if we ever wanted to switch away from Amazon for the service, pages using those URLs would break.
It would be better to use a custom domain name — to serve pages from https://cdn.knightlab.com — so that we could move that service if we ever want to. Until recently, setting this up involved a $600/month fee for a dedicated IP address. Last year, Amazon added the ability to use your own SSL certificates with Amazon CloudFront at no additional charge with Server Name Indication (SNI). While Amazon's guides to SSL for S3 mention that SNI is not universally supported in browsers, it is so widely supported that we saw no reason for concern.
Making it happen
There are five basic steps. Some of them get a little involved.
- Obtain an SSL certificate
- Upload your SSL certificate
- Configure your S3 bucket
- Create a CloudFront "Web" distribution
- Point your domain name to the CloudFront domain name.
Obtain an SSL certificate
Some of these details will vary based on the certificate authority you choose for your SSL certificate. Generally, the cost for certificates varies based on the strength of encryption and the lengths to which the authority goes to verify details about the organization making the request. Since we don't conduct e-commerce or handle highly sensitive data, we chose a relatively inexpensive option: we purchased a PostiveSSL Wildcard SSL certificate from Namecheap. ("Wildcard" means we can use a single certificate to secure multiple knightlab.com subdomain names.)
No matter which authority you choose, you must generate a Certificate Signing Request (CSR). This request is a formal way of indicating that your organization controls the domain name for the site where the certificate will be installed. We followed these directions for generating a new private key and a CSR using OpenSSL. You would want to replace domain_com with something that is relevant to you and helps you manage these files.
openssl req -nodes -newkey rsa:2048 -keyout domain_com.key -out domain_com.csr
Once you have a CSR, you must submit it to the authority to have it signed. For Namecheap, go through the purchasing process, and then go to your SSL Certificates list page. Click the "Activate Now" link next to your certificate. Select "Apache + OpenSSL" and paste the contents of the CSR file you generated. You will receive an email with a link to approve the certificate.
After approval, you will get another email with a zip attachment containing your four certificate files. The name of the last file will be different based on the name of the file you uploaded in the previous step.
- AddTrustExternalCARoot.crt (Root CA Certificate)
- COMODORSAAddTrustCA.crt (Intermediate CA Certificate)
- COMODORSADomainValidationSecureServerCA.crt (Intermediate CA Certificate)
- STAR_domain_com.crt (PositiveSSL Wildcard Certificate)
These four SSL certificates, from the root certificate to the end-user certificate, represent the SSL certificate chain. You must bundle the intermediate and root certificates and install them along with your end-user certificate.
Create the bundle by combining the root and intermediate .crt files into a single file. The order of concatenation is important:
cat COMODORSADomainValidationSecureServerCA.crt COMODORSAAddTrustCA.crt AddTrustExternalCARoot.crt > domain_com.ca-bundle.pem
Upload your SSL certificate to AWS IAM
To use your SSL certificate with CloudFront, you need to upload it to AWS IAM, which must be done using the AWS Command Line Interface tools. I already had Python 2.7 and pip installed, so I installed the tools using pip:
sudo pip install awscli
and configured the tools using the configure command:
aws configure
Then, upload your certificate:
aws iam upload-server-certificate \

--server-certificate-name domain.com \

--certificate-body file://STAR_domain_com.crt \

--private-key file://domain_com.key \

--certificate-chain file://domain_com.ca-bundle.pem \

--path /cloudfront/
For more information about each parameter, run:
aws iam upload-server-certificate help
Configure your bucket
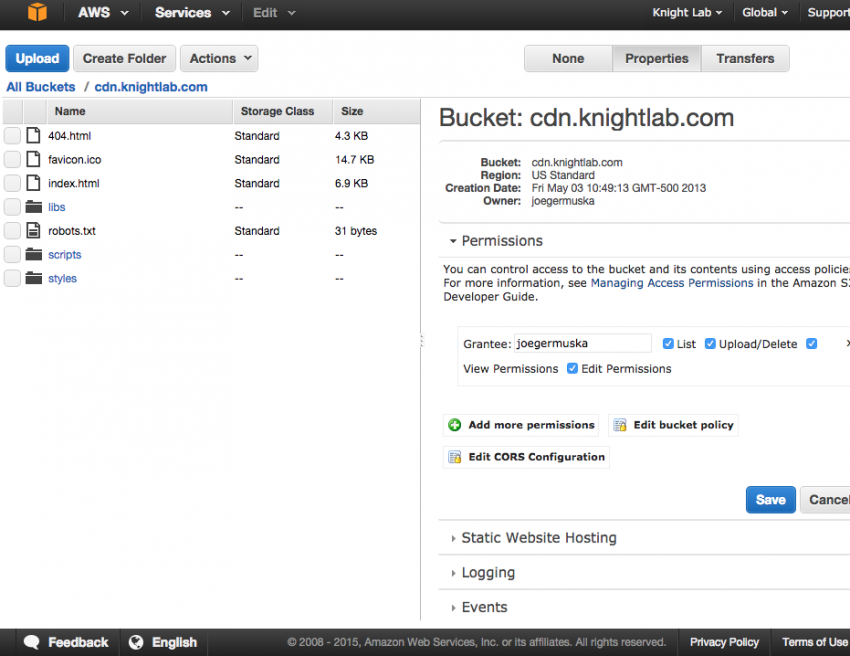
You need to set a policy on your S3 bucket so that CloudFront can read the content. In the S3 Management Console, select the bucket and open the Properties tab.

Under Permissions, click "Add bucket policy". Enter the following policy (changing "your-bucket-name" to the name of your bucket) and save it.
{

  "Version":"2012-10-17",

  "Statement":[{

    "Sid":"PublicReadGetObject",

    "Effect":"Allow",

    "Principal": {

      "AWS": "*"

    },

    "Action":["s3:GetObject"],

    "Resource":["arn:aws:s3:::your-bucket-name/*"]

  }]

}
While you're here, make a note of the "Endpoint" listed under the "Static Website Hosting" section. You will need this to set the origin for your CloudFront distribution.
Create a CloudFront "Web" distribution
Before creating your CloudFront distribution, you need to decide how long you want your objects to stay in the CloudFront cache before CloudFront forwards a request to your origin. You have many options.
Since we update our origins fairly often and want those changes to become effective within a short period of time, we decided to control caching using Cache-Control headers on our S3 objects.
- Origin Domain Name = the bucket endpoint listed under "Static Web Hosting" in S3.
- Origin Protocol Policy = HTTP Only. This specifies how CloudFront will contact your S3 website, and S3 website hosting only supports serving content over HTTP.
- Viewer Protocol Policy = HTTP and HTTPS - we didn't want existing HTTP links to break
- Forward Headers = Since we need CORS support, we whitelisted the "Origin" header.
- Object Caching = Use Origin Cache Headers. This is where the decision on your cache policy comes into play.
- Alternate Domain Names (CNAMEs) = Enter the domain name(s) that people will actually use to visit your website (e.g. cdn.knightlab.com)
- SSL Certificate = Chose "Custom SSL Certificate", and then select the certificate that you uploaded to IAM.
- Custom SSL Client Support = Only Clients that Support Server Name Indication (SNI)
- Default Root Object = index.html
Create the distribution and wait until the Status column shows it is deployed. It took up to 30 minutes for each of our distributions to be created.
Point your domain name to the CloudFront domain name
After it is deployed, the distribution info will list a domain name (e.g. abcdefg.cloudfront.net). You will need to point your human-friendly domain name to this domain name (e.g. create a CNAME record in Route53 for yourdomain.com).
Tagged


