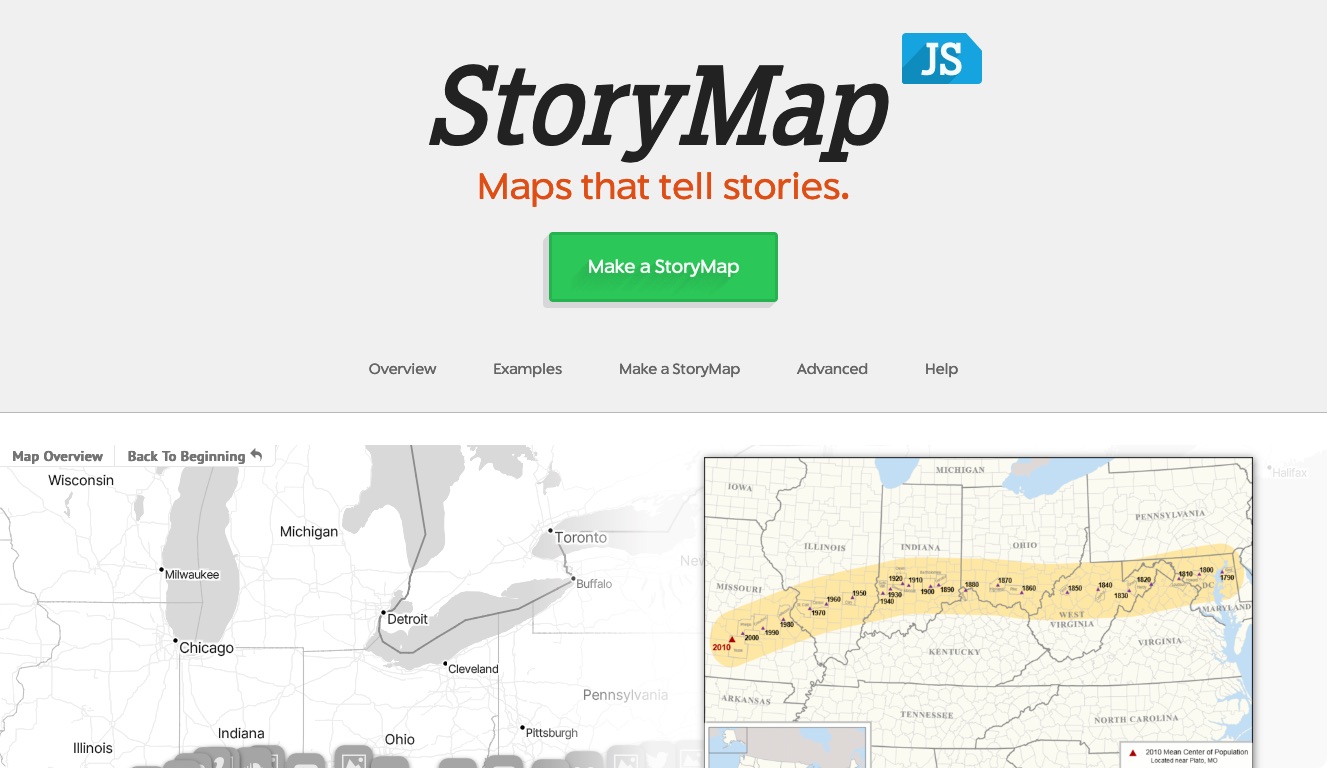
Where? is one of the fundamental questions journalists set out to answer, but often, the maps produced to accompany stories feel flat, or are hard to interpret. StoryMapJS is a new Knight Lab tool to help you connect the places of your story into a media-rich narrative. Like its sibling, TimelineJS, StoryMap makes it really easy to illustrate your work with photos, videos, sound, tweets and more.
And today it's easier still: a couple of months ago when we announced the "developer release" of StoryMapJS, it still required some comfort with code to make a your own StoryMaps. Now, we are happy to invite you to try out the tool that makes creating your own as easy as it has been to make new Timelines.
We know there's still testing to be done to make sure StoryMapJS works well on every browser and with whatever content people imagine to publish with it. In fact, we need your help, so please make some and let us know how it goes. (We'd also like to develop a nice example gallery, so if you have one you're particularly proud of, let us know.)
If you find that the tool doesn't behave as described, or that your StoryMap looks weird, or if you have any other feedback, we would very much like to hear from you. Take a look at our StoryMapJS support forum, or if you'd prefer, submit a private support request. (Please pick one, not both.)
A few notes on using the authoring tool

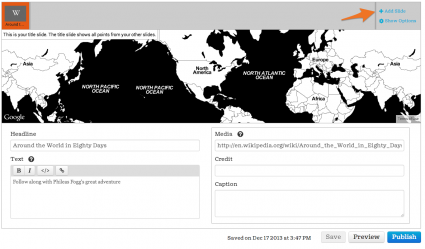
The first time you go to the authoring tool, you must give the StoryMap tool permission to store files on your Google Drive account. Click on the "authorize" button (marked with the orange arrow in this screenshot) and follow the instructions in the pop-up window.
Once you're authorized, you'll see a list where your storymaps are listed. Of course, the first time you won't see any, but you can click on the blue "New StoryMap" button to get started.
After naming your new project, you'll see the "overview" slide. Use this as a title slide, to set the stage. You don't add actual locations to this slide: instead, StoryMap shows all the points for your other slides on this map, and adjusts the zoom so that they can all be seen.
 After configuring your overview slide, use the "Add slide" button in the top right to add your first slide. You can search for places by name by typing into the small box in the top right corner of the map. Select a place from the suggestons and the StoryMap tool will drop a pin down. If you want to fine-tune it, you can drag the pin to a new location. Note that while you can zoom in and out of the map in the authoring tool, the zoom level is not saved—StoryMap always computes an ideal zoom level for your readers.
That's about all there is to it. StoryMap saves every time you add a new slide, but you can also click on the "Save" button in the bottom right. (If it's grayed-out, that means you don't need to save, because you haven't changed anything since the last time it was saved.)
If you want to see just what your StoryMap will look like to your audience, click the "Preview" button. When you're totally read, click the "Publish" button. The StoryMap tool will show you a popup with a block of HTML. Copy this HTML into your own site, and your StoryMap should "just work."
Once you've published a StoryMap, you can still come back to edit it later. While you are editing, your changes are saved in a 'draft,' so no one will see your work in progress. When you click the "publish" button, the original is updated, so pages where you are displaying the StoryMap will automatically show the last published version.
About the author

Tagged